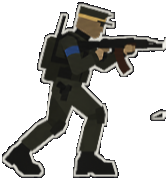

Every update so far has added a layer of command to DummyWar, and the order wheel is the piece that ties them together. It is the difference between spawning two teams and letting them sort it out, and running a battle.
Opening the order wheel
Press Q and the wheel appears with the six orders the commander can issue:
- Attack a point — send the squad at a specific position.
- Defend it — hold the named position rather than chase.
- Follow me — the squad moves with you.
- Hold position — stop and stay put, useful for anchoring a flank.
- Resupply — send the squad to a crate.
- Cancel the order — hand them back to their own behaviour.
While an order is active it stays on screen and its target is marked in the world, so you can see what your squad is doing and where they are going without opening the wheel again.
Supply crates
Crates have been placed at capture points and at the bases, and they come in three kinds:
- Ammunition — for the rifles, the machine guns and the RPG.
- Medical supplies — bandages, tourniquets and painkillers.
- Drone cases — replacements for the FPV and bomber drone operators.
The rules around them are what make the system interesting. At the base, supplies are unlimited. At a capture point they are finite: the side holding the point can resupply there, the crates are used up as they are drawn from, and they replenish gradually over time. That means a capture point is not just a flag — it is a supply source that the other side can steal by taking it back.
Players resupply by standing at a crate and pressing E.
The bots run the same system
Resupplying is not a player-only privilege. Bots go and resupply on their own when they run out of bandages, rockets or grenades, which is what stops a squad from quietly degrading over a long battle. A soldier bleeding out because nobody resupplied is a rare sight in the current build; a soldier who took a rocket to the face because nobody resupplied is not.
A workable loop
Put together, the order wheel and the crates give you a repeatable cycle that works on both maps:
- Hold a point and order the squad to defend it while you take the second position yourself.
- Resupply at the crate on the point you hold, because holding a point means owning its supply.
- Push with the fresh squad while the other one keeps the enemy pinned, so the AI cannot concentrate.
- Rotate before you are spent. A squad that is out of rockets and bandages is not a squad, it is a group of wounded soldiers walking back to the base.
Where the order wheel stops working
Orders apply to the AI soldiers under your command. They do not solve the problems of a map you do not know. If you have never seen the Dead Ground trench lines, an order to attack the forward trench will send a good squad into a bad position. Read the map first — the battlefield guide covers what is actually out there.